Instructions
for use
For an easy application
Instructions for use
Installation instructions
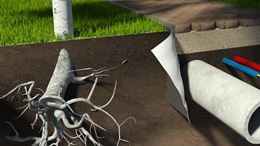
- Section off the area that needs to be covered with BIDIM® Weed Stop.
- Eradicate all the visible weeds on the first few centimeters.
- Level the ground.
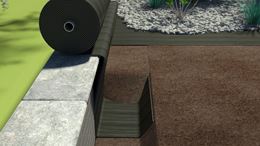
- Dig a trench, position BIDIM® Weed Stop and anchor it by filling the trench.A
- Make sure each strip of BIDIM® Weed Stop overlaps by 20 centimeters.B
- Fix the edges of BIDIM® Weed Stop using metal stakes on every meter.C
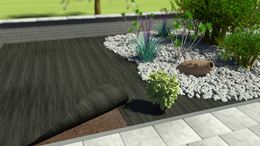
Placing plants
- Decide the positioning of the plants and cut a cross.D For smaller plants or bare rooted plants it may be sufficient to cut a line instead of a cross.
- Fold down the edges of the cross and dig a hole big enough for the plant (use a bucket or wheelbarrow to store the soil).
- Remove the pot, place the plant, pack the soil and water copiously.
- Fold back the edges and fix them with metal stakes (if necessary).
- Cover BIDIM® Weed Stop with wood chips or stones.
Instruction for use
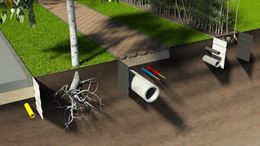
- Plan the installation of the root barrier to minimize the number of joints required.
- Dig a trench to install the root barrier next to existing plants or excavate an area in case new plants are to be installed.
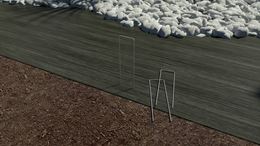
- Install BIDIM® Bamboo Stop Pro vertically with the black side facing the roots.A
- Make sure to install the root barrier at a depth of at least 70 cm.B
- At least 2 cm of BIDIM® Bamboo Stop Pro must be visible above the surface.C
- The free space between the plants and BIDIM® Bamboo Stop Pro should be about 2 meters.D
Details make perfection
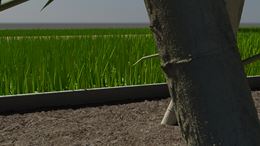
- Ideally, when installing the root barrier, let it protrude 10 - 15 cm and cut it off at the end of the installation. This way you will not end up with an unprotected portion when it settles during filling.
- In all cases, cut the barrier 2 cm above ground level, because rhizomes can crawl on the soil surface when they are crossing an obstacle.

Installation instructions
- Unroll the product along the length of the area to be covered to avoid excessive cutting.
- Make sure you have side overlaps of around 20 cm if the area to be covered is wider than the product.
- Draw a floor plan before laying. Choose the most suitable roll width with a few cm to spare.
- Unroll the products at a gradient from the top downwards.
- Avoid laying the product when there is a strong wind. Weigh it down if necessary.
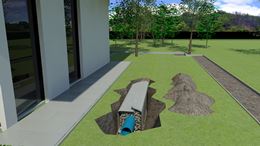
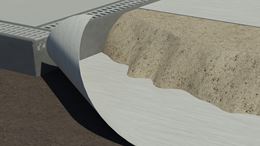
- Drainage: the best results are obtained by placing the geotextile around the gravel to increase the filtration surface.
- Do not leave the product lying in the mud, since this reduces the filtering capacity.
- Do not leave the product lying in the sun for a longer period of time.
This product is designed to let water through. It is not a seal.
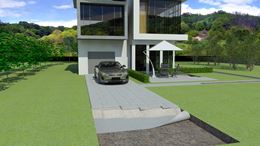
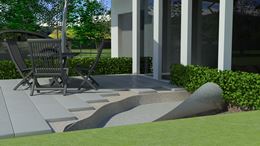
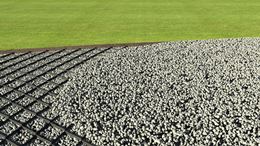
Applications
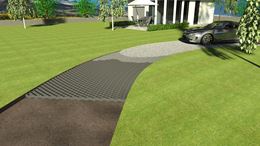
Driveway stabilizationA
Terrace stabilizationB
DrainageC
Pedestrian path stabilizationD


Installation instructions
- Make sure the ground has sufficient bearing capacity for the intended use and traffic. Consult us if reinforcement is required.
- Excavate the area to the height of a cell + 3 cm.A
- Position the BIDIM® Accorder panel and fix/ secure its edge with 2/3 metal stakes.
- Stretch the BIDIM® Accorder panel to its required length and secure the edge with 2/3 metal stakes.B
- Cut off surplus material with a knife or scissors.
- Fill the entire panel with aggregate and distribute it to fill all of the cells.
- Add additional aggregate to cover the BIDIM® Accorder panels.C
- Compact aggregate with a compaction roller.
Tips
- BIDIM® Accorder can also be placed on bends, the structure follows the path perfectly.
- BIDIM® Accorder can be installed on slopes up to 15%.
- Using a thermal knife will allow cleaner cuts, without effort and without fraying the edges.
- After installation BIDIM® Accorder is immediately trafficable by public works equipment, cars, trucks, bicycles, motorcycles etc.D
Installation instructions
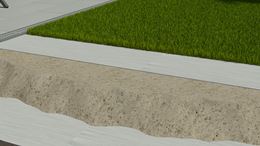
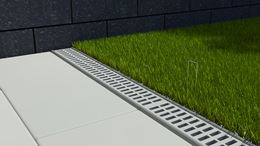
- Excavate 10 to 15 cm over the area to be covered. Make sure there is a slight outward slope. Place a layer of TenCate nonwovens to stabilizethe soil. A
- Fill with 10 to 15 cm of well compacted sand. To make sure your lawn is more stable and lasts longer, place a second layer of TenCate nonwovens between the sand and the grass. B
- In the case of very humid soil, complete the installation with a drainage trenchC
- The pile direction should face your main view point, in most cases this means facing towards the house. If laying rolls of grass side by side make sure the pile is running in the same direction.
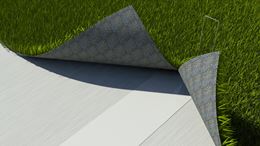
- To join two pieces of turf, flip the edges over to reveal the backing. Trim both pieces of turf in the middle between a line of stitching, move the two pieces of turf into place so that the spacing is the same as the spacing between the stitches, and the join is not noticeable when you brush the blades up with your hand along the join.D
- Install the adhesive joining strip
- Fix the grass using non corrosive pegs which cannot cause injury (Adhesive joining strip and fixing pegs sold separately).
- For an optimum result, alternative tot he use of fixing spikes, ballast the turf with 5 to 8 kg of siliceous sand per m2. Straighten up the blades of grass using a stiff builder’s brush.
Maintenance
Clean the grass with a stiff builder’s brush and / or leaf vacuum cleaner or blower, if necessary: Clean with a hose, you can use some diluted bleach. If the artificial grass is laid under trees, an anti-moss product can be used once a year.
Important!
Avoid laying grass in hollows, avoid laying without using ballast or fixing pegs and avoid trafficking the grass with wheeled vehicles. Intense heat sources (barbecue, cigarettes...) can damage the turf.